January 31, 2012

Weekly Tidbits: Avocado Grilled Cheese


Avocado Grilled Cheese
I felt inspired to tackle the classic grilled cheese after reading an article written by Ruth Reichl for Gilt Taste on several small changes you can make to take your grilled cheese from ordinary to extraordinary.  Although I think we all have to admit that it's not physically possible to make a bad grilled cheese.  It's cheese and bread.  Even if you fail to melt the cheese or burn the crust, it's still cheese and bread!  Frankly, I'll eat one in pretty much any condition.

I have loved the classic white bread and Velveeta grilled cheese since childhood.  On a faster and similar note, I used to eat cheese pouches (Hoffman Super Sharp + Pita Bread + 45 sec microwave) for lunches in high school.  Or breakfasts. Or snacks.  Did I mention I love cheese?

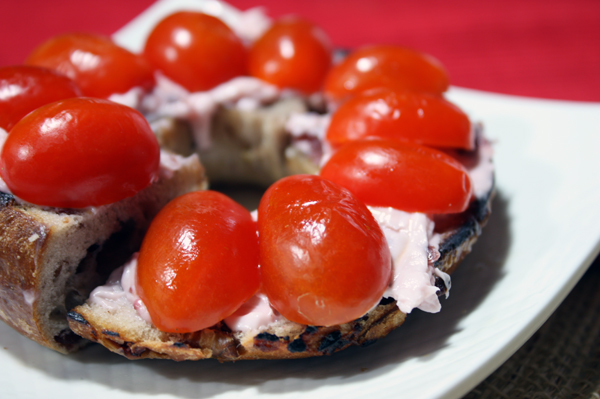
As I've grown older, I've experimented with new variations.  Whole grain, seeded, honey and oat breads.  I've combined provolones, cheddars, swiss, monterrey jack and brie.  I've rotated in tomatoes, faux ham, spicy mustards, even peanut butter on occasion.  I've also always known that the key to a melted, golden edged grilled cheese is patience and low heat.

So not everything Ms. Reichl describes in this article is new to me.  But what really turned the tables on me in the article was her suggestion to coat the outside of the sandwich not with butter, but with mayo.  Mayo!  I really hate mayo.  I was raised on Miracle Whip Light and have the same sort of violent opinion on the matter that I reserve for Yankees vs. Red Sox debates (clearly, the Yankees are smarmy, overpaid, juiced up egotists that have never deserved a single World Series win).  So when I gave this savvy suggestion a shot with MW instead - and just as awesome, adding a little tang to the sandwich, while perfectly browning the bread.

Another great suggestion was shredding the cheese as opposed to laying on slices.  Most cheeses aren't overly processed and meant to melt at the drop of a hat like pasteurized cheese product, so by grating the cheese you increase the surface area exposed to the heat and it melts so much faster!  Bravo, Rachel!

Avocado Grilled Cheese

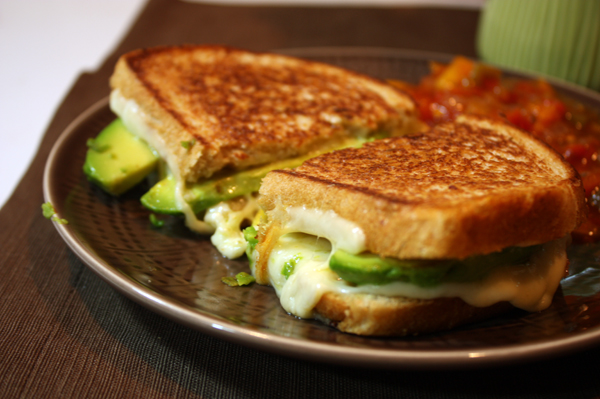
Here is a little summary of the new and improved grilled cheese sandwich:

2 slices of Whole Foods 365 Organic Mighty Multigrain Bread
1 tbsp Miracle Whip Light, divided in two parts
3 slices of deli-sliced Havarti (or grate if you buy a hunk)
1/4 cup of shredded mozzarella
1/2 avocado, 1/4" slices lengthwise
Spectrum coconut oil spray
  1. Spray your nonstick frying pan with a light layer of coconut oil and heat to medium.  Toss in the slices of avocado and saute, flipping them periodically, until a light gold crisps the edges.  Remove from heat and set aside.
  2. Re-spray the pan with a little more coconut oil (or use butter depending on preference and health concerns - although you're eating a grilled cheese sandwich so I assume health isn't your primary focus in constructing a meal) and place on high heat.
  3. Slather the miracle whip on one side of each piece of bread, and place one, miracle whip side down, into the pan once it has heated up.  Immediately drop the temperature to low heat.  
  4. Sprinkle or lay your cheese onto the first piece of bread, and top with the second, miracle whip side facing upward. The first side will take on the order of 5 minutes or so.  During this time watch some hulu or wash some dishes. 
  5. Once the bottom half of the cheese begins to melt, it's ready to flip.  At this stage, the bread shouldn't be golden, merely a little shiny and softer.  Repeat this melting process on the second side, but don't flip again until the bottom side is a golden brown.  This should be faster than the first half.
  6. Once you're back to your original side, grab some tongs or use your fingers to peel up the top piece of bread.  Layer your lightly sauteed avocado in the cheese.  Allow the sandwich to cook until the first side browns to match the second.  
  7. Remove from heat, cut in half and serve! (I enjoyed mine with some mango salsa!)
Avocado Grilled Cheese

January 24, 2012

Orange, Pineapple and Banana Muffins


Pineapple & Orange Mini Muffins

I originally found this recipe on Cafe Sucre Farine and had every intention of following it to the letter ... up until I looked in my fridge and realized that I was missing some key ingredients.  But never fear, I can substitute like a champ!

Glazed Pineapple, Orange & Banana Muffins

For muffins:
1 stick butter, softened
½ cup sugar
1 large egg
2 cups flour
½ teaspoon baking soda
½ teaspoon baking powder
¼ teaspoon salt
1 cup greek yogurt, plain
1 teaspoon vanilla extract
1 medium ripe banana, diced
½ cup chunk canned pineapple, drained and diced (reserve juice)
1 naval orange, segmented

For glaze and topping
½ cup powdered sugar
1 tablespoon of reserved pineapple juice

⅓ cup granulated sugar
½ teaspoon cinnamon
1 teaspoon orange zest

Directions for muffins:


1. Preheat oven to 350˚F.

2. In a small bowl, toss together pineapple, orange and banana like a fruit salad.

3. Using either an electric mixer or separate bowl, whip together softened butter and sugar. Add the egg, continuing to mix, and lastly beat in the greek yogurt and vanilla.

4. In a third bowl (yes, three!), sift together the dry ingredients (flour, baking soda, baking powder, and salt).

5. Now bring it all together: Slowly add the wet batter to the dry ingredients, one spoonful at a time. Once combined, then gently fold in the fruits.

6. Divide mixture evenly into a mini-muffin pan, either nonstick or using muffin cups. This should make approximately 24 mini muffins.

The dry ingredientsOrange, pineappleBatting 1000
Batter-up!

7. Place muffins in oven. Bake 15 to 20 minutes or until golden. Allow muffins to cool before applying glaze.

8. Combine powdered sugar and pineapple juice until smooth for the glaze, and then drizzle it atop the cooled muffins.  Combine sugar, flour orange zest and cinnamon and sprinkle atop the glaze before it sets.


Orange, Pineapple, Banana Muffins

January 14, 2012

Spicy Sauteed Okra (Bhindi)

A few weeks ago I was introduced to this amazing dish whipped up by a friend of friend's wife.  We had returned to the house from a winding shopping trip and were ready for a bite to eat.  Food preferences can always be a bit tricky when you're a guest in someone's home, but luckily my friend chimed in that I was a vegetarian while the menu was still under debate.  The news was readily accepted and a plan for an all Indian-meal was devised with curry, rice, potatoes and bhindi (okra).

It was my first time having okra outside of a Southern gumbo-type situation and I was completely blown away (actually it was also my first time having authentic, homemade Indian outside of a restaurant). The okra was so crisp, flavorful and fresh with a depth of spices to enhance what remained a solid green vegetable dish.  Who knew?  I always pictured okra as sour and slimey. Clearly someone has been cooking it wrong.  With cravings to try this delicious main dish, I ended up prompting one of my Indian coworkers for the recipe - she immediately knew what I was talking about, and while she professed she personally wasn't a fan, that she'd snag the details from her friend.

And the result is below!  I added a bit of yogurt in because I thought it was a touch dry without an accompanying dish (yes, I just sat down and gluttonously ate a whole bowl of it).  Some scallions or dill would make a nice touch to mix in with the yogurt as well.  I'll add an update if I make any adjustments to the recipe in the future, as I've seen a variety of options online as well that I'm itching to try in an attempt to bring a more complex range of flavors. Enjoy!

Spicy Sauteed Okra

0.5 lb okra
Olive oil
Salt (to taste)
1 tsp coriander
1 tsp tumeric
1 tsp cumin
1 tsp chile powder
Dash of cayenne
1/2 cup of greek yogurt, plain (optional)
1/4 cup scallions, chopped

1. Wash and chop okra into 1/2" pieces, disposing of stems.
2. Add a tablespoon of olive or coconut oil to a saute pan with the burner set on medium heat.  Add okra and spices to the pan and begin to cook, stirring with a wooden spoon as you go.
3.  After about 10 minutes, the okra should begin to get golden in the white centers near the seeds, the slippery interiors will dried up and the edges will begin to get caked with spices.  Taste to verify that the spices are to your liking, mix in a little extra if necessary at this time to adjust.
4.  Continue to cook until the edges are browned and the okra has soften, no longer the crisp fresh fruit.
5.  Serve immediately with a dollop of plain greek yogurt and a dusting of fresh scallions.

Chopped OkraSpicy OkraSpicy Okra

January 4, 2012

Weekly Tidbits: Tomato and Cranberry Bagel

Grape Tomato and Cranberry Cream Cheese Bagel

I made an exciting trip to Panera Bread this week, when I had a massive craving for a bagel and cream cheese.  Rather than just one, I ended up grabbing a half dozen of the Cranberry Walnut Bagels along with their new Cranberry Orange Cream Cheese.  Yum.

What I always forget when surrounded by the scent of fresh breads and soups at Panera is that I never eat bagels, let alone at home.  It takes me weeks if not months to eat six of those puppies, so they always end up in the freezer, which seriously dents their freshness.

So in an attempt to have a well portioned lunch, I tossed together half of a toasted bagel, a slathering of the deliciously sweet cranberry orange cream cheese - and what really made, left it fresh and clean were the halved grape tomatoes I popped on top.  Something about the cranberry-orange-tomato combo that sent me straight to heaven.

Highly recommended way to get in a quick, filling lunch!

Grape Tomato and Cranberry Cream Cheese BagelGrape Tomato and Cranberry Cream Cheese Bagel
Related Posts Plugin for WordPress, Blogger...