March 1, 2012

Weekly Tidbits: Cauliflower + Sweet Pepper Casserole

Cauliflower + Sweet Pepper Casserole
I tossed this together from the ingredient in my fridge.  I had this big plan to make fresh pesto to toss with peas and fettucine tonight, but....I was a couple days late on the basil.  It had gone bad.  So what else was in there?  Cauliflower that needed to be cooked up ASAP.

I had some cream cheese leftover from the Banana Cake earlier this week, so I used that as the base to my gratin, I added a little spice, red pepper (sale!) and breadcrumbs to turn it all casserole-like.  Pop it in the over and delicious!  Here is how it goes.

Cauliflower + Sweet Pepper Casserole

Ingredients: 


1 head of cauliflower, rinsed and sliced
1 red pepper, large diced
1 cup of cream cheese
1/2 cup of vegetable broth
1 tsp chilli powder
1 tsp of Joe's Stuff (cajun seasoning)
Salt and pepper to taste
1/4 cup bread crumbs
1/4 cup of shredded parmesan

Directions:
  1. Pre-heat the oven to 375.
  2. First steam your cauliflower. While the cauliflower is steaming until tender, toss your diced red peppers into a pan with some oil to soften and brown around the edges. Toss together the cauliflower and peppers into a medium-sized baking dish.
  3. Steamed caulifowerSautee PeppersVegetable base
  4. Next prepare the sauce:  In a small saucepan on low heat, combine cream cheese, broth, and seasonings.  Stir until combined and beginning to bubble at the edges.
  5. Cream Sauce
  6. Pour the cheese cause over the vegetables in the pan, gently turning them with a spatula to coat.  Once combined, dust the top of the casserole with a combination of bread crumbs and shredded Parmesan.
  7. Place in the oven and bake until the top is golden and melted.
  8. Cauliflower + Sweet Pepper Casserole

February 28, 2012

Banana Ice Cream Cone Cupcakes with Cream Cheese Frosting


Banana Cone Cupcakes Another birthday, another "cake" to make.  I was given free reign this time around.  I wanted fruit to be involved, but I had limited time and couldn't whip up the mousse cake I would have preferred.  So instead, I went for creativity over complexity.  Or at least that's what I thought.

So I found the how-to on cupcake cones at the blog House of Hepworths.  She describes this fantastic holder cut from a foil pan, which appeals to my crafty senses.  Well, I might have gone a bit overboard.  I bought a deep roasting pan, since the cake takes like 90 minutes to cook through (it's a sloooooow cake recipe) and therefore I didn't have three hours to spare by the time I rolled home at 10pm (That's right, I got suckered into post-work drinks and forgot about my ambitious cake-making plans).

Well, let me warn you:  Do not use a roasting pan to get 18 holes in for your cones.  The cones don't rest on the cookie sheet below and the pan is left to support their weight.  It will sink in the middle as it heats up.  The batter will spill out into the great big lake of batter in the middle of your aluminum holders.  The cheap ice cream cones will then get soaked with batter, soften up and holes will form in the sides further allowing more batter to pour out.  It's not pretty.  At all.

It was so distressing that I forgot to photograph the massive oven disaster.  I was too busy in how-can-I-fix-this mode.

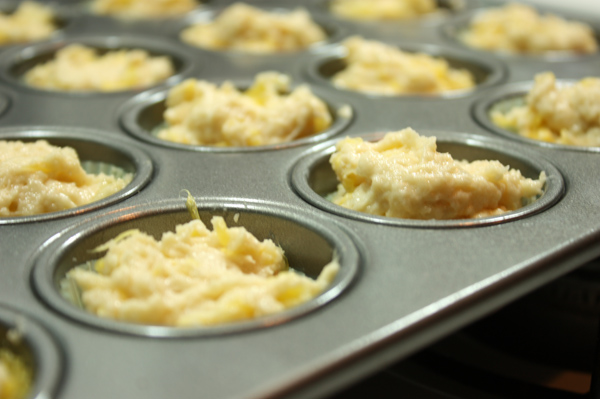
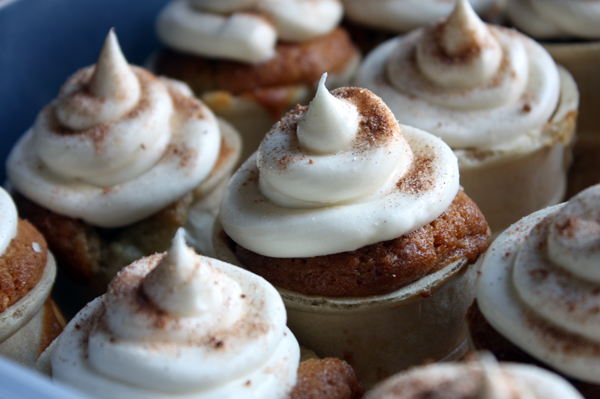
So how did I fix it?  I removed all of the cones and placed them upright in a high-sided baking pan.  I topped off the batter with my extra (thank goodness for the double batter recipe!), and then placed them back into over at 350F.  The majority were still a little lop-sided, prone to leaking or a little crusty, but overall they TASTED fine. Right?  And I could cover up the tops with the delicious frosting.
Banana Ice Cream Cone Cupcakes


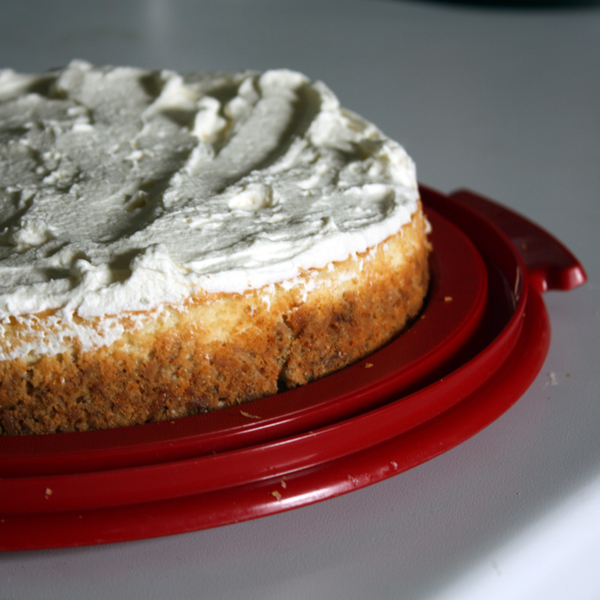
Lesson?  Well, this is amazing cake.  This is amazing cream cheese frosting.  This should not be wasted in a styrofoamy ice cream cone.  Just bake the cake by itself.  And if you want to do the cone thing, use a half dozen loaf pans that will hold 3 cones each.  It's tedious, but if you have a giant oven, lots of time, or just stick with the traditional box mix cake, you should be fine.

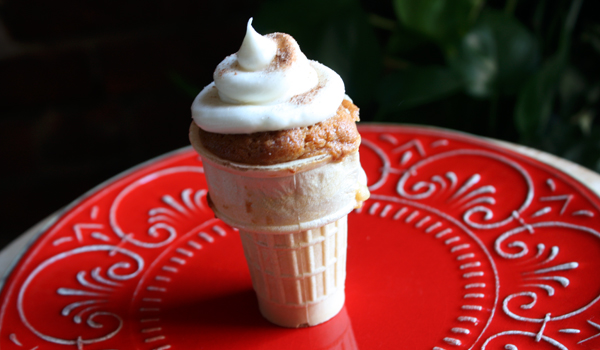
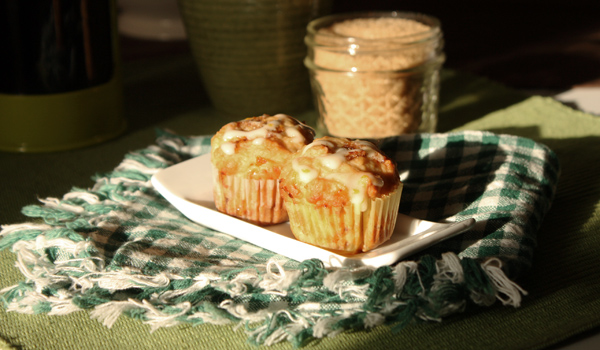
Banana Cake in Ice Cream Cones with Cream Cheese Frosting
Recipe circulating the web a million times over with one source at allrecipes.com


Batter (this makes twice as much batter as you need for 24 cones, so plan on make a little loaf too):
3 bananas, mashed, ripe
2 teaspoons lemon juice
3 cups flour
1 1/2 teaspoons baking soda
1/4 teaspoon salt
3/4 cup butter, softened
2 1/8 cups sugar
3 large eggs
2 teaspoons vanilla
1 1/2 cups buttermilk

Frosting:
1/2 cup butter, softened
1 (8 ounce) package cream cheese, softened
1 teaspoon vanilla
2 cups confectioners’ sugar
**
cinnamon & sugar, for dusting

Directions:

1. Preheat oven to 250°.
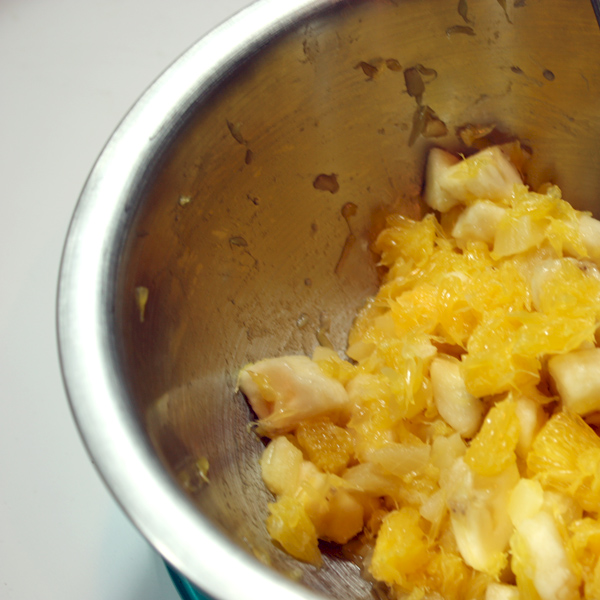
2. In a small bowl, mix mashed banana with the lemon juice; set aside.
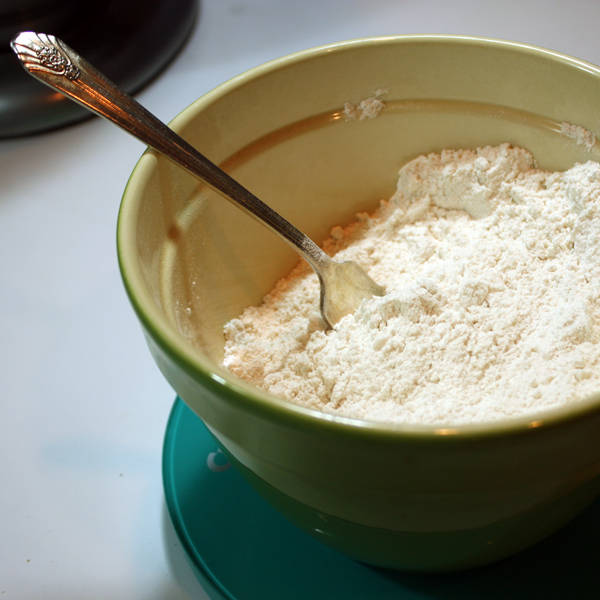
3. In a medium bowl, mix flour, baking soda and salt; set aside.
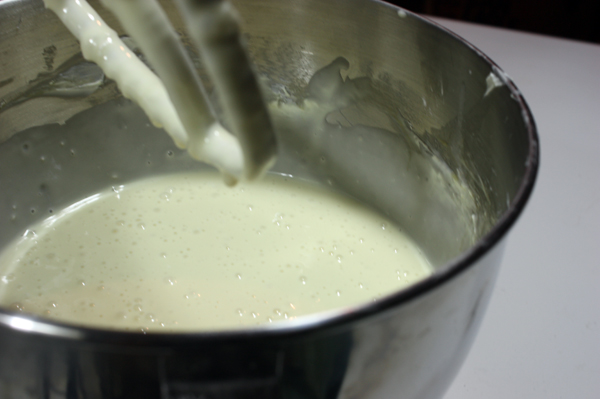
4. In a large bowl, cream 3/4 cup butter and 2 1/8 cups sugar until light and fluffy. Beat in eggs, one at a time, then stir in 2 tsp vanilla.
5. Beat in the flour mixture alternately with the buttermilk. Stir in banana mixture.

Butter and sugar whiskedEggs and vanilla addedFlour and buttermilk added
6. In a 9 x 13" baking pan, place as many upright ice cream cones in the pan as possible.  Pour batter into  each of the ice cream cone cups to apprximately 1/2 inch from the top of the cone.  There will be approximately 1/2 of the batter left after 18 cones.  Save it or pour it into a loaf pan for a cake on the side.
7. Bake in preheated oven for one hour or until toothpick inserted in center comes out clean. Remove from oven.
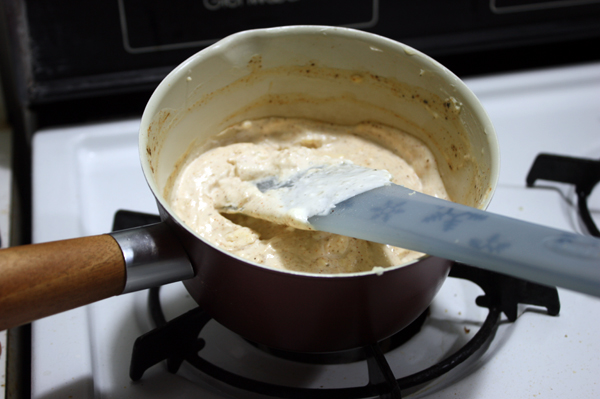
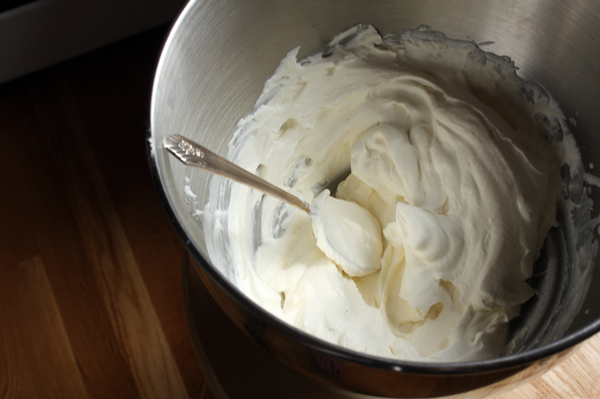
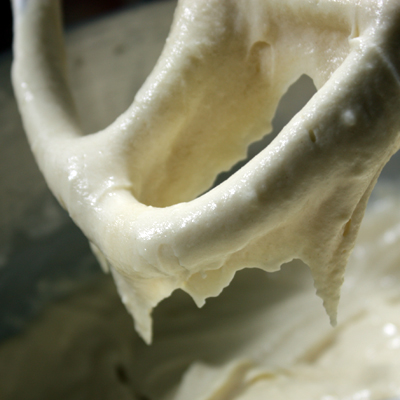
8. For the frosting, in an electric mixer with a whisk attachment, cream the butter and cream cheese until smooth. Beat in 1 teaspoon vanilla. Add confectioners' sugar and beat on low speed until combined, then on high speed until frosting is smooth.
9. Scoop the frosting into a pastry bag without a tip, just the plastic tip-attachment piece (or a wide open round tip), and create soft serve-like swirls on top of your cake-cones.  Dust with cinnamon sugar (or I used the cinnamon dolce topping from Starbucks).


Banana Ice Cream Cone Cupcakes

February 21, 2012

Eating Out: San Francisco, Part I

I ran off to San Francisco at the beginning of February for business, hence the screeching halt of my blog posts.   So while there has been a bit of a dry spell on the posting front, I have had a dozen amazing food experiences during my absence.  Honestly, the best part of visiting a new city is the food.  Eating at new places.  And boy does San Francisco really come through in the restaurant department.

I was typically rushing off for work-related purposes, so the scope of establishments was limited to something of a two block radius of my hotel. But even within such a small corner of the city, there were far too many delicious places to try over the course of the eleven official meal times available.  Sadly, I couldn't even score eleven fantastic meals due to time crunches and an overwhelming sense of fullness that carried me through the trip (omg, I ate so much!).  A number of my meals were on the go (a la Starbucks or a Mojo bar in the purse), a couple were forgettable bites at the hotel bar, and the Superbowl was a blandly catered event at the Marriott Marquis - although memorable due to the bizarre and excessive usage of olives in every single dish and appetizer (I'm not kidding).

Tropisueño

My very first meal for the trip landed me at an adorable Mexican restaurant called  Tropisueño.  Now it's unique in that before 4pm, you order food from a carry out counter off from a tall floor to ceiling canvas menu.  The great part about the menu is the big, open-armed welcome it gives to vegetarians and vegans.  All of your classic food truck-style tacos, tamales, flautas, tortas, etc. are available with flavorful sauteed veggies.  It's the magic and spice of the meat without the meat. Once you pay for and receive your food at the checkout counter, you can take it to go or settle down at a table or the bar.  At the end of the bar is a salsa bar, where you can load up on a dozen different options for the tortilla chips provided with your meal. I highly recommend the fresh tomatillo salsa (you know, the green one).

Now 4pm is when happy hour breaks out and runs until 7pm.  Three hour happy hour?  Crazy, right?  Discount margaritas and food. As a Boston native, it delights me to see discounted alcoholic beverages, since such a thing is prohibited in our Puritanical city. Now at 4pm, the food counter closes up and your only source of munchies comes from the happy hour menu. That is, until 5:30pm, when the dinner service starts. With dinner service, the tacqueria and bar turns into a classic restaurant.  A hostess seats you, a server comes to your table for orders.  The meals, whether at the table or the bar, are started with tortilla chips and a selection of three of salsas from the earlier mentioned salsa bar.

So I rolled into this place around 3:30pm for a late lunch, ordered some veggie tacos and sat down at the bar.  Over the course of the next two hours awaiting my friend to arrive,  I tested out the following margaritas.  Both delicious and unique, as I'm partial to herbal concoctions.:

Santo: A St. Germaine elderflower liqueur Margarita. Rocks and salt.
Tropisueño: Canton ginger liqueur is balanced with meyer lemon and tequila. Served up with rose-infused sugar and lemon salt.

When my friend arrived, we devolved to discount house margaritas, describes as "appropriate measures of Agave nectar, fresh lime juice and Tequila. Served on the rocks. Arbol chili salt."  There really was nothing discount about them, only that we didn't pay full price.  I am a huge fan of these flavored salt rims, especially the chili salt.  Take note, I'm definitely tossing these together for margaritas lovers around the holidays.

February 18, 2012

Fluffy Coconut Cheesecake


Triple Coconut Cheesecake

You're probably beginning to get the idea that I do 85% of my baking for work.  You'd be right.  There are about 18 coworkers that I actively and daily interact with, each of whom has a birthday.  As a result, every few weeks I have a reason to whip up something sweet and get immediately feedback from a captive audience.

This week my co-worker Mitchell had a birthday.  He loves coconut.  Last year, I made him these jazzy super-duper coconut cupcakes.  They were actually coconut-ized box yellow cupcakes.  I like to think that I took the box to a new level.  If you know anything about my history with cake, it's that I'm actually pretty terrible at making it from scratch. It's a bit like rice.  I can't for the life of me make proper rice.  Something always goes wrong - too hard, too soft.  With cake, it's too dry or too dense.

So this year when I asked Mitchell what he wanted for a cake, he said again: Coconut.  I had free reign.  Having not make cheesecake in some time (and my fridge had three bars of malingering cream cheese), I thought 'Perfect!'  And I found the perfect recipe.

Now I found the cheesecake on The Novice Chef, but the recipe itself was written by a guest blogger from food + words.  Everything positive that was said about this cheesecake is absolutely true.  And I only changed a couple things based upon the ingredients in my house (per usual).  To quote agnes in Despicable Me: 'It's so fluffy!' So let's just to it!

As a brief overview of my changes:
  1. I love to make my cheesecake crusts with crushed pretzels, since it's super absorbent and makes this unique sweet + salty flavor.  So I subbed pretzels for the graham crackers.
  2. I doubled the whipped cream topping recipe because frankly, with the amount in that recipe, even using my KitchenAid, it went to only 1/2 the height of the towering masterpiece on The Novice Chef blog.  You definitely want twice as much fresh whipped cream, trust me
  3. Triple Coconut Cheesecake: UntoppedTriple Coconut Cheesecake: Too shortTriple Coconut Cheesecake: Final
  4. I also scooped the coconut cream off the top of the coconut milk to set aside for use in the whipped cream.  This thick cream is frequently used as a dairy-free substitute for whipped cream.  So really, this makes sense.
  5. I really want to emphasize temperature when it comes to cheesecake.  Make sure your ingredients are at room temperature, whether its the softened cream cheesecake, butter or the eggs.
  6. I have never once used a water bath, and I've made cheesecake in a wide variety of ovens, so I just skipped out on that step and my cake didn't crack.  So, not a big deal if you don't want to use a water bath, in my opinion.

Triple Coconut Cheesecake
Adapted from The Novice Chef with guest blogger from food + words.

Ingredients:

For the crust:
1 cups of crushed pretzels (food processor!)
1/2 cup granulated sugar
1 teaspoon of cinnamon
1/2 cup shredded sweetened coconut
5 tablespoons unsalted butter, melted

For the filling:
24 oz cream cheese, softened
1 cup granulated sugar
1 tablespoon cornstarch
1 teaspoon vanilla extract
1/4 teaspoon kosher salt
3 large eggs, at room temperature
7 ounces coconut milk, separate from the thick cream on top and just use the milky part
1/2 teaspoon coconut extract

For the coconut whipped cream:
2 cups heavy whipping cream
1/2 cup confectioners’ sugar
1 cup of the thick cream off the top of the coconut milk
1/2 teaspoon coconut extract
1/2 cup toasted coconut, for topping

Directions:

  1. Preheat the oven to 350 degrees F.
  2. In a bowl, combine pretzel crumbs, granulated sugar, cinnamon and shredded coconut and stir until evenly mixed. Next, pour in the melted butter and mix until the dry ingredients are saturated.
  3. Dump the crust mix into a springform pan and then press it against the bottom and sides until it create an even layer throughout. It might be a little crumbly, but just make sure there are no blatant gaps.
  4. Pretzel Crust
  5. Bake for 10-12 minutes. Remove from oven and allow to cool. Reduce the oven temperature to 325 degrees F.
  6. Using an electric mixer, use a paddle attachment to whip the cream cheese until light and aerated. Add the granulated sugar, cornstarch, vanilla extract and salt. Beat until smooth and combined. While still mixing, add one egg at a time. Add the coconut milk and extract and beat until combined.
  7. Cheesecake batter
  8. Pour the filling into the cooled pretzel crust, and place it on a baking sheet (to catch spills) in the oven.  Bake for an hour or until the filling is set and golden at the edges.  Remove and allow to cool.
  9. While your cheesecake is cooling, or the next morning, prepare the coconut whipped frosting.  In your electric mixer, add heavy whipping cream, coconut cream (reserve from before!), coconut extract and confectioners’ sugar. Whisk until stiff peaks have formed.  Spread a thick layer on top of the cheesecake, and top with the toasted coconut flakes.  Keep chilled in the refrigerator until ready to serve.
  10. Whipped coconut topping

January 31, 2012

Weekly Tidbits: Avocado Grilled Cheese


Avocado Grilled Cheese
I felt inspired to tackle the classic grilled cheese after reading an article written by Ruth Reichl for Gilt Taste on several small changes you can make to take your grilled cheese from ordinary to extraordinary.  Although I think we all have to admit that it's not physically possible to make a bad grilled cheese.  It's cheese and bread.  Even if you fail to melt the cheese or burn the crust, it's still cheese and bread!  Frankly, I'll eat one in pretty much any condition.

I have loved the classic white bread and Velveeta grilled cheese since childhood.  On a faster and similar note, I used to eat cheese pouches (Hoffman Super Sharp + Pita Bread + 45 sec microwave) for lunches in high school.  Or breakfasts. Or snacks.  Did I mention I love cheese?

As I've grown older, I've experimented with new variations.  Whole grain, seeded, honey and oat breads.  I've combined provolones, cheddars, swiss, monterrey jack and brie.  I've rotated in tomatoes, faux ham, spicy mustards, even peanut butter on occasion.  I've also always known that the key to a melted, golden edged grilled cheese is patience and low heat.

So not everything Ms. Reichl describes in this article is new to me.  But what really turned the tables on me in the article was her suggestion to coat the outside of the sandwich not with butter, but with mayo.  Mayo!  I really hate mayo.  I was raised on Miracle Whip Light and have the same sort of violent opinion on the matter that I reserve for Yankees vs. Red Sox debates (clearly, the Yankees are smarmy, overpaid, juiced up egotists that have never deserved a single World Series win).  So when I gave this savvy suggestion a shot with MW instead - and just as awesome, adding a little tang to the sandwich, while perfectly browning the bread.

Another great suggestion was shredding the cheese as opposed to laying on slices.  Most cheeses aren't overly processed and meant to melt at the drop of a hat like pasteurized cheese product, so by grating the cheese you increase the surface area exposed to the heat and it melts so much faster!  Bravo, Rachel!

Avocado Grilled Cheese

Here is a little summary of the new and improved grilled cheese sandwich:

2 slices of Whole Foods 365 Organic Mighty Multigrain Bread
1 tbsp Miracle Whip Light, divided in two parts
3 slices of deli-sliced Havarti (or grate if you buy a hunk)
1/4 cup of shredded mozzarella
1/2 avocado, 1/4" slices lengthwise
Spectrum coconut oil spray
  1. Spray your nonstick frying pan with a light layer of coconut oil and heat to medium.  Toss in the slices of avocado and saute, flipping them periodically, until a light gold crisps the edges.  Remove from heat and set aside.
  2. Re-spray the pan with a little more coconut oil (or use butter depending on preference and health concerns - although you're eating a grilled cheese sandwich so I assume health isn't your primary focus in constructing a meal) and place on high heat.
  3. Slather the miracle whip on one side of each piece of bread, and place one, miracle whip side down, into the pan once it has heated up.  Immediately drop the temperature to low heat.  
  4. Sprinkle or lay your cheese onto the first piece of bread, and top with the second, miracle whip side facing upward. The first side will take on the order of 5 minutes or so.  During this time watch some hulu or wash some dishes. 
  5. Once the bottom half of the cheese begins to melt, it's ready to flip.  At this stage, the bread shouldn't be golden, merely a little shiny and softer.  Repeat this melting process on the second side, but don't flip again until the bottom side is a golden brown.  This should be faster than the first half.
  6. Once you're back to your original side, grab some tongs or use your fingers to peel up the top piece of bread.  Layer your lightly sauteed avocado in the cheese.  Allow the sandwich to cook until the first side browns to match the second.  
  7. Remove from heat, cut in half and serve! (I enjoyed mine with some mango salsa!)
Avocado Grilled Cheese

January 24, 2012

Orange, Pineapple and Banana Muffins


Pineapple & Orange Mini Muffins

I originally found this recipe on Cafe Sucre Farine and had every intention of following it to the letter ... up until I looked in my fridge and realized that I was missing some key ingredients.  But never fear, I can substitute like a champ!

Glazed Pineapple, Orange & Banana Muffins

For muffins:
1 stick butter, softened
½ cup sugar
1 large egg
2 cups flour
½ teaspoon baking soda
½ teaspoon baking powder
¼ teaspoon salt
1 cup greek yogurt, plain
1 teaspoon vanilla extract
1 medium ripe banana, diced
½ cup chunk canned pineapple, drained and diced (reserve juice)
1 naval orange, segmented

For glaze and topping
½ cup powdered sugar
1 tablespoon of reserved pineapple juice

⅓ cup granulated sugar
½ teaspoon cinnamon
1 teaspoon orange zest

Directions for muffins:


1. Preheat oven to 350˚F.

2. In a small bowl, toss together pineapple, orange and banana like a fruit salad.

3. Using either an electric mixer or separate bowl, whip together softened butter and sugar. Add the egg, continuing to mix, and lastly beat in the greek yogurt and vanilla.

4. In a third bowl (yes, three!), sift together the dry ingredients (flour, baking soda, baking powder, and salt).

5. Now bring it all together: Slowly add the wet batter to the dry ingredients, one spoonful at a time. Once combined, then gently fold in the fruits.

6. Divide mixture evenly into a mini-muffin pan, either nonstick or using muffin cups. This should make approximately 24 mini muffins.

The dry ingredientsOrange, pineappleBatting 1000
Batter-up!

7. Place muffins in oven. Bake 15 to 20 minutes or until golden. Allow muffins to cool before applying glaze.

8. Combine powdered sugar and pineapple juice until smooth for the glaze, and then drizzle it atop the cooled muffins.  Combine sugar, flour orange zest and cinnamon and sprinkle atop the glaze before it sets.


Orange, Pineapple, Banana Muffins

January 14, 2012

Spicy Sauteed Okra (Bhindi)

A few weeks ago I was introduced to this amazing dish whipped up by a friend of friend's wife.  We had returned to the house from a winding shopping trip and were ready for a bite to eat.  Food preferences can always be a bit tricky when you're a guest in someone's home, but luckily my friend chimed in that I was a vegetarian while the menu was still under debate.  The news was readily accepted and a plan for an all Indian-meal was devised with curry, rice, potatoes and bhindi (okra).

It was my first time having okra outside of a Southern gumbo-type situation and I was completely blown away (actually it was also my first time having authentic, homemade Indian outside of a restaurant). The okra was so crisp, flavorful and fresh with a depth of spices to enhance what remained a solid green vegetable dish.  Who knew?  I always pictured okra as sour and slimey. Clearly someone has been cooking it wrong.  With cravings to try this delicious main dish, I ended up prompting one of my Indian coworkers for the recipe - she immediately knew what I was talking about, and while she professed she personally wasn't a fan, that she'd snag the details from her friend.

And the result is below!  I added a bit of yogurt in because I thought it was a touch dry without an accompanying dish (yes, I just sat down and gluttonously ate a whole bowl of it).  Some scallions or dill would make a nice touch to mix in with the yogurt as well.  I'll add an update if I make any adjustments to the recipe in the future, as I've seen a variety of options online as well that I'm itching to try in an attempt to bring a more complex range of flavors. Enjoy!

Spicy Sauteed Okra

0.5 lb okra
Olive oil
Salt (to taste)
1 tsp coriander
1 tsp tumeric
1 tsp cumin
1 tsp chile powder
Dash of cayenne
1/2 cup of greek yogurt, plain (optional)
1/4 cup scallions, chopped

1. Wash and chop okra into 1/2" pieces, disposing of stems.
2. Add a tablespoon of olive or coconut oil to a saute pan with the burner set on medium heat.  Add okra and spices to the pan and begin to cook, stirring with a wooden spoon as you go.
3.  After about 10 minutes, the okra should begin to get golden in the white centers near the seeds, the slippery interiors will dried up and the edges will begin to get caked with spices.  Taste to verify that the spices are to your liking, mix in a little extra if necessary at this time to adjust.
4.  Continue to cook until the edges are browned and the okra has soften, no longer the crisp fresh fruit.
5.  Serve immediately with a dollop of plain greek yogurt and a dusting of fresh scallions.

Chopped OkraSpicy OkraSpicy Okra

January 4, 2012

Weekly Tidbits: Tomato and Cranberry Bagel

Grape Tomato and Cranberry Cream Cheese Bagel

I made an exciting trip to Panera Bread this week, when I had a massive craving for a bagel and cream cheese.  Rather than just one, I ended up grabbing a half dozen of the Cranberry Walnut Bagels along with their new Cranberry Orange Cream Cheese.  Yum.

What I always forget when surrounded by the scent of fresh breads and soups at Panera is that I never eat bagels, let alone at home.  It takes me weeks if not months to eat six of those puppies, so they always end up in the freezer, which seriously dents their freshness.

So in an attempt to have a well portioned lunch, I tossed together half of a toasted bagel, a slathering of the deliciously sweet cranberry orange cream cheese - and what really made, left it fresh and clean were the halved grape tomatoes I popped on top.  Something about the cranberry-orange-tomato combo that sent me straight to heaven.

Highly recommended way to get in a quick, filling lunch!

Grape Tomato and Cranberry Cream Cheese BagelGrape Tomato and Cranberry Cream Cheese Bagel
Related Posts Plugin for WordPress, Blogger...